Woo, it’s been a long time since I messed with pick & place stuff. Bad Tim.
An irritation I have been having is making everything work using reliably sourceable, off-the-shelf parts (not lucky eBay/surplus finds). In particular I’ve found small “tin can” stepper motors are hard to source in small quantities repeatably, and once you do, finding timing belt pulleys to fit the shaft of the motor you’ve just scored is a fresh new challenge. In a previous iteration, I use some steel tubing and superglue to shim a motor shaft up to size(ish), but here is an alternate approach: my “pick & place” machine is just my CNC machine with a vacuum head bolted on, so why not just cut some pulleys on a CNC machine?
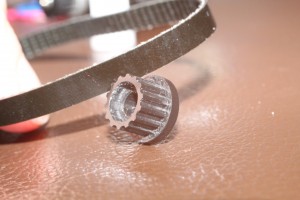
For reference, here is the existing head in action.
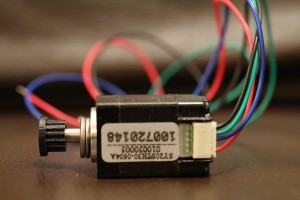
This last attempt used the “40DP” type small timing belts/pulleys* since they seemed to be readily available here. Despite the massive main pulley and tiny one on the motor, the gear ratio works out to only about 5.2:1. This is adequate for a typical 1.8deg/step stepper (~0.35 degrees/step final head resolution), but pretty coarse for a 7.5deg/step tin-can motor. This is the smallest ‘proper’ stepper I can find in hobbyist quantity and pricing, and it seems to work well. The shaft diameter is 4mm. (Sidenote: A note on the product’s page indicates it now comes with a flatted shaft. You may wish to augment the below to take advantage of this.)
Here is what I did to make a 40DP pulley to work with the new motor. Similar process ought to work for other pulley profiles and sizes.
Thingiverse user drofarts has put together a set of parametric pulley design files in OpenSCAD format. These are CAD files, but more like a text scripting language than a traditional CAD package. You need to install OpenSCAD to use these files if you don’t have it already. Open the desired file and tweak parameters as needed, such as the desired profile, number of teeth, shaft diameter, etc. Use Design -> Compile and Render to see what you’re going to get. For best results in the next step, set the ‘no_of_nuts’ parameter to zero to simplify the output. When satisfied, use Design -> Export as STL… to save the file.
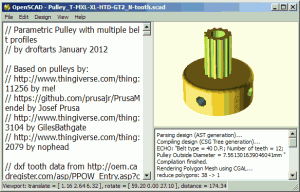
If you were planning to make it on a 3D printer, you’re pretty much done! You can output .stl directly. I don’t have one and will be carving it on a CNC mill, so an extra step is necessary. Basically, you’re going to want to carve the 3D model down to a simplified, 2D representation of just the pulley profile, and do any CNC/toolpath-specific monkeying in your favorite CNC software. For this, OpenSCAD’s ‘projection’ feature can be used. I created a separate scad file that simply imports the .stl from the first step and presents a 2D projection of the pulley profile only.
projection(cut=true) translate([0,0,-8.5]) import("C:/data/projects/pickplace/head/pulleys/Pulley_T-MXL-XL-HTD-GT2_N-tooth.stl");
Change the path and filename to the file you generated, of course. The negative Z ‘translate’ parameter lowers the part partially below the ‘floor’ (zero), which, combined with the ‘cut=true’ projection parameter, causes the bottom part of the pulley (large flanged base with setscrew holes we can’t cut on the CNC) to be excluded from the projection. You may need to modify this parameter depending on the height of the pulley you generated.
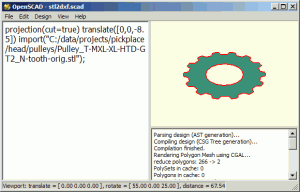
Then save this using Design -> Export as DXF.
I cut this pulley from a piece of flat Delrin stock using a 1/32″ (0.03125 inch / 0.79375mm) router bit. A larger bit may not be able to get in between the teeth for 40DP profile. In my CNC software (CamBam) I added a bottom shoulder by outside pocketing the pulley profile to 1/4″ depth, then carving the rest of the way through the stock at a slightly larger diameter. If needed, a top shoulder can be added by gluing a washer to the top of the newly created pulley.
But does it work?
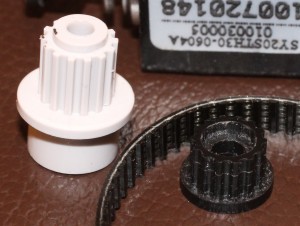
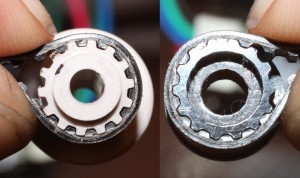
Yes :-) Below are some comparison images of the homemade pulley vs. a commercially available one. The latter is fine except that it doesn’t come in the shaft diameter I need.
* I can’t seem to find any source/documentation on what the various timing belt “standards” are, or what makes one different/better than another. Also, that source seems to have gone out of business. Suggestions for either of these resources welcome.
Leave a Reply