Finally, a blinky project of the scale I can actually bite off these days (unlike pre-kids), but it requires a bit of backstory.
My wife’s mom absolutely loves Christmas, and like many families, their Christmas is full of tradition. It just wouldn’t be Christmas without egg dish, Dead Thelma Neuboldt’s Merry Christmas Chicken in the ceremonial orange crock, a troll Christmas tree1, new holiday jammies or 18 kinds of cookie. Among those traditions is a light-up table decoration, formally:
Acrylics Aglow, Illuminating the Ice – from the JC Penney Home Collection
…or informally, as my kids would gleefully announce whenever they saw it:
It’s the lighting-up-crotch snowman!
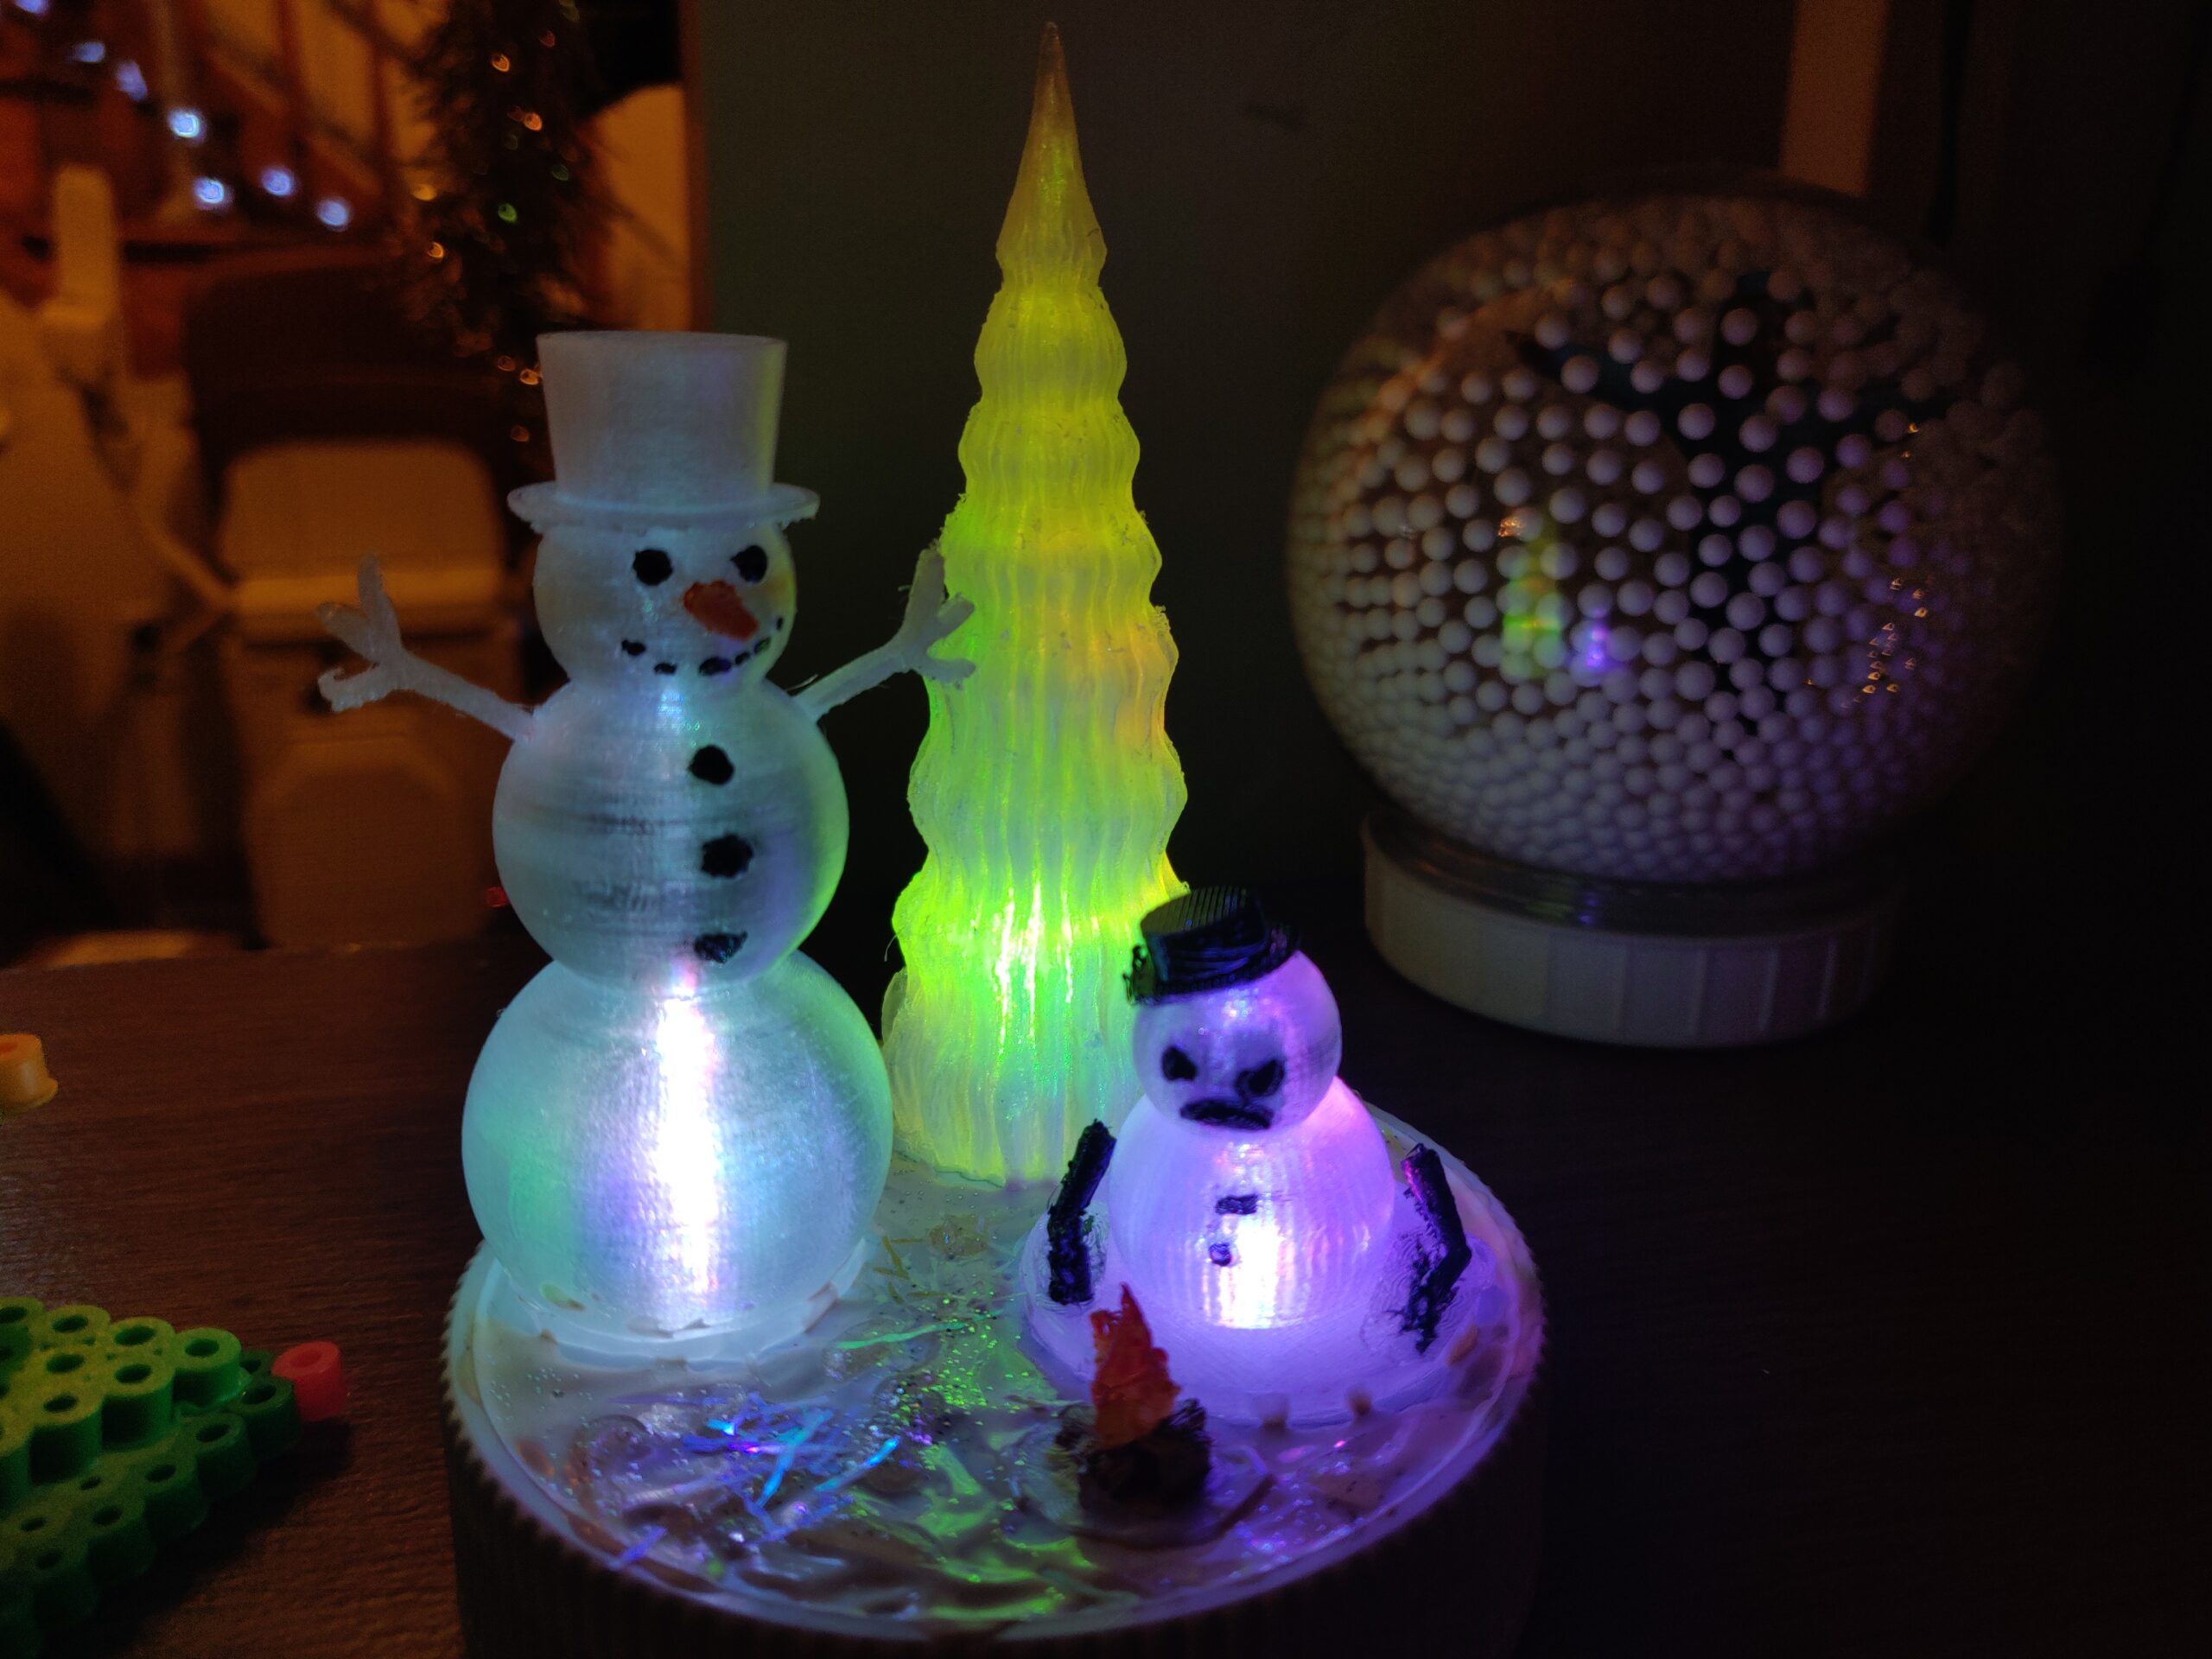
Illuminating the Ice features two translucent ice skaters with flowing scarves and other proper winter attire with snowman heads and carrot noses, with a pine tree in the background. To the neverending mirth of our young ones, each of these figures is lit by color-changing LEDs with, for the skaters, somewhat unfortunate placement.

As bona-fide family holiday tradition with the added bonus of being a bit cheesy and very slightly NSFW, Illuminating the Ice has been mailed around as their own kids moved out and the family Christmas gathering place rotated, finally landing at my sister-in-law’s, where it was probably decided that subjecting this now-rare heirloom to the whims of mail carriers is too much of a gamble, and there it has remained.
Whew. That’s a lot of setup.
Anyway, to keep some semblance of the tradition alive when Christmas happens in our neck of the woods, I built my own homage to the decoration that’s fairly well smaller and easy to store for the other 11 months of the year, but preserves that one critical feature.

If it looks like I cheesily snagged some 3D printable models off Thingiverse and epoxied them to the top of a peanut butter jar lid, you’re sadly mistaken. They are hot-glued to the peanut butter jar lid.
The actual construction is more-or-less self-explanatory, but the bill of materials is roughly:
Printed Models:
- Campfire by TheCaitasaurus
- Freezooo the Evil Snowman by Malkavita (melting in front of the campfire)
- Tea Light Snowman by kenkay
- Pine Tree by darkcrono (significantly stretched tall/skinny to match the original aesthetic)
- Models are resized or scaled (stretched/shrunk) to taste. The pine tree in the photo above is just shy of 4″ tall, so the decoration can sit on
my trashpicked man-eating speakersa small table and is easy to store.
Filament:
- Anything clear/translucent, I used Overture Clear PETG and ‘vase mode’ (‘Spiralize outer contour’ in Cura’s slicer), but they are pretty interchangeable.
Electronics:
- 5V wall-wart (pre-USB surplus phone charger with the barrel plug cut off; any old USB-B charger should work, use the red+black wires)
- 5mm “slow-changing” RGB LEDs (similar to these), or fixed colors to taste, etc. They are poked thru drill holes in the lid to the desired height and hot-glued into place.
- Current limiting resistors, ~120-330 ohm range. These are probably unnecessary for LEDs with their own color-change chip baked in, but can’t hurt (and will subdue the brightness a bit). A resistor is wired in series with each of the LEDs, which are in turn in parallel with the common power supply.
Other:
- Small white plastic lid. This one is from a Justin’s Peanut Butter jar, I had it handy in the recycle bin and it fits the aesthetic of the original somewhat
- Puff paint, glitter and cut tinsel for the ‘snow’
- Acrylic paints and/or
Sharpie markerfor the color accents. Lesson learned, don’t use Sharpie marker for small color features on 3D-prints, it wicks along the layer lines and makes a mess.


- E.g. wider than it is tall, or so much taller than the room it would go in that the top half is cut off, or full of squirrels… ↩︎
Leave a Reply