
Spoiler alert time. Did you know there are ferrous metal composites with arbitrary Curie points, extending down to room temperature and even below freezing? You never know where a teardown of a theoretically boring product will lead. Seriously, take more stuff apart, it’s good for you.
I’ll spare you the lengthy story of the goldfish that finally decided it was big enough to turn cannibal, but I needed to evict some sundew plants from a small betta tank I had on the windowsill, and make it habitable for actual fish on short notice in winter. Hurry, right? It turns out the options for tiny low-wattage heaters for small tanks are kind of limited, so click, click, buy. Soon, gracing me with its presence is this cute little heater stick. The size is right, but the hairs on the back of my neck stood up a bit on noticing this fine Chinese gadget’s 120VAC cord is meant to go from the wall socket directly into the water. If you had the kind of parents itching to slap that spoonful of raw-egg cookie dough out of your mouth, or the kind that made you do all chainsaw juggling outside, they’d probably have a thing or two to say about this too. Not only is it a fully submersible heater, but the instructions actually warn against leaving the top (cord entrypoint) of the heater out of the water (or tilting it, but that’s neither here or there).
To my pleasant surprise, this thing worked as advertised, maintaining the tank at more-or less a balmy 78F, and not electrocuting anyone or anything. However, just shy of a whopping 6 months after purchase, I notice the heating indicator light is staying on constantly, but it’s no longer actually producing any heat. So, let’s have a peek inside and see what happened! You can probably guess, but the innards are mildly interesting regardless. Let’s take a look.
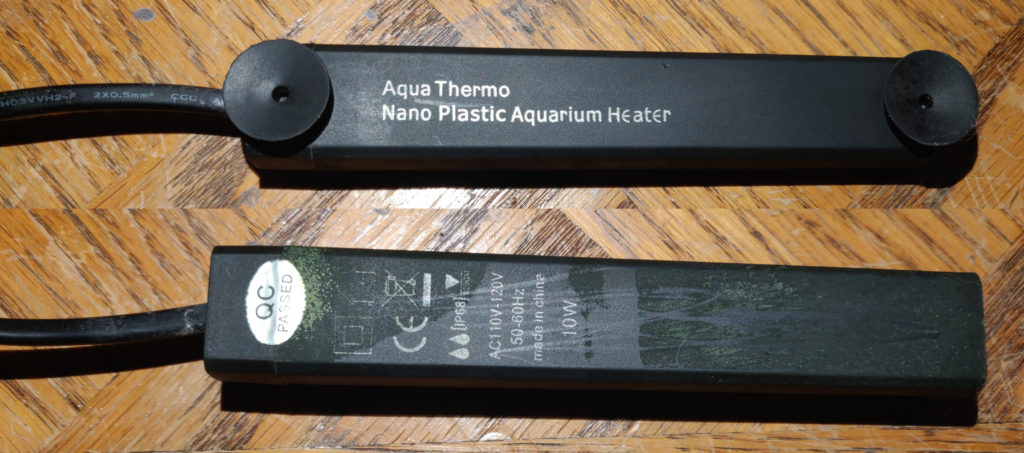
According to the actual marking on the unit, this is the “Aqua Thermo Nano Plastic Aquarium Heater”. Through a cursory search on Amazon, the exact same heater is sold under a wide variety of manufacturer names, including a collection of randomish all-caps names like GOOBAT, VIBIRIT, PGFUNNY and dozens more, in some cases with claimed power ratings up to 300 Watts(!).

These small “betta heaters” seem to come in two varieties: those with a preset thermostat, permanently set to a fairly high temperature around 78F, and those that are just a fixed resistor that continuously injects a certain number of watts of heat into the tank. (There is a third kind advertising a PTC thermal control element, that according to reviews, are actually just a fixed resistor with no thermostatic element.)
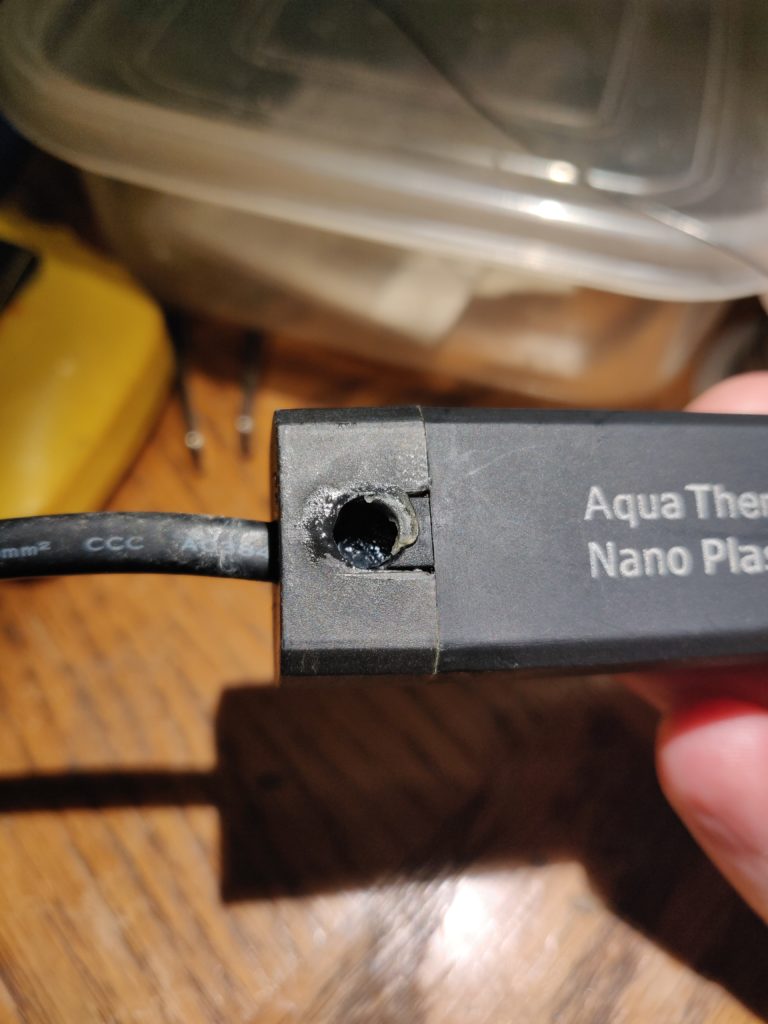
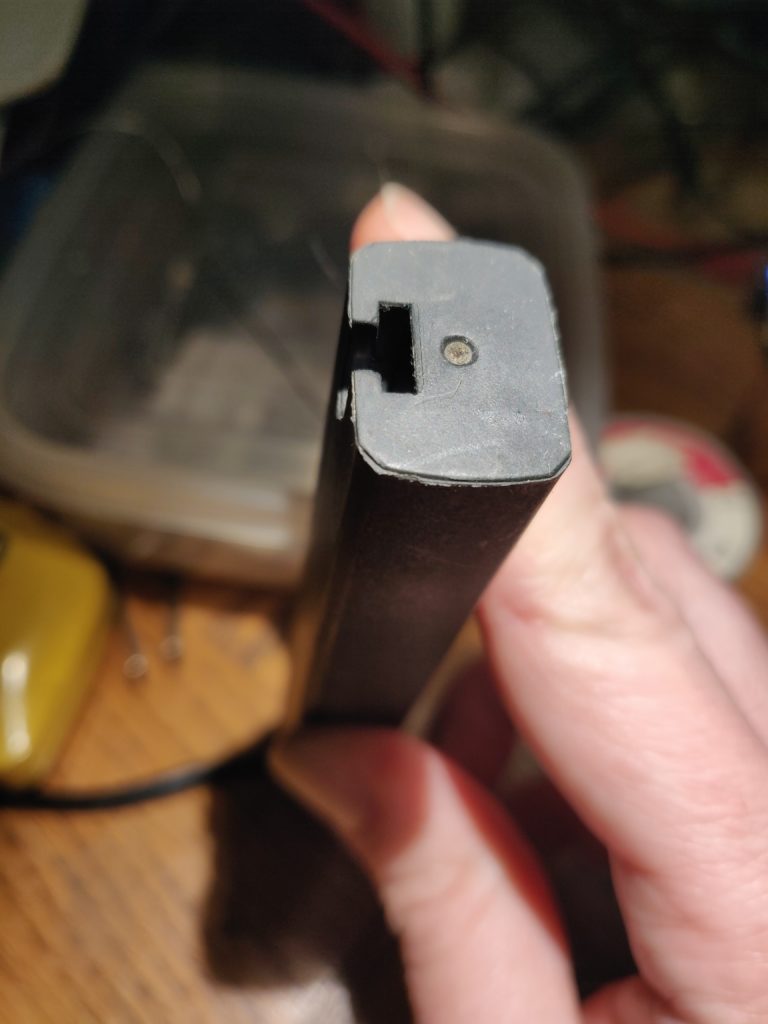
The submersible unit has only one obvious seam, near the top where the “cap” receiving the power cord enters (the seam-like line around the bottom face appears to be a moulding artifact; this is all a single piece). The top cap is mostly decorative; popping it off reveals, along with a bit of trapped water, a second, rubber cap glued in place by an adhesive resembling RTV silicone caulk. This is the seal protecting the 120V cord and innards from water intrusion. Removing this inner cap reveals the simple circuit inside.
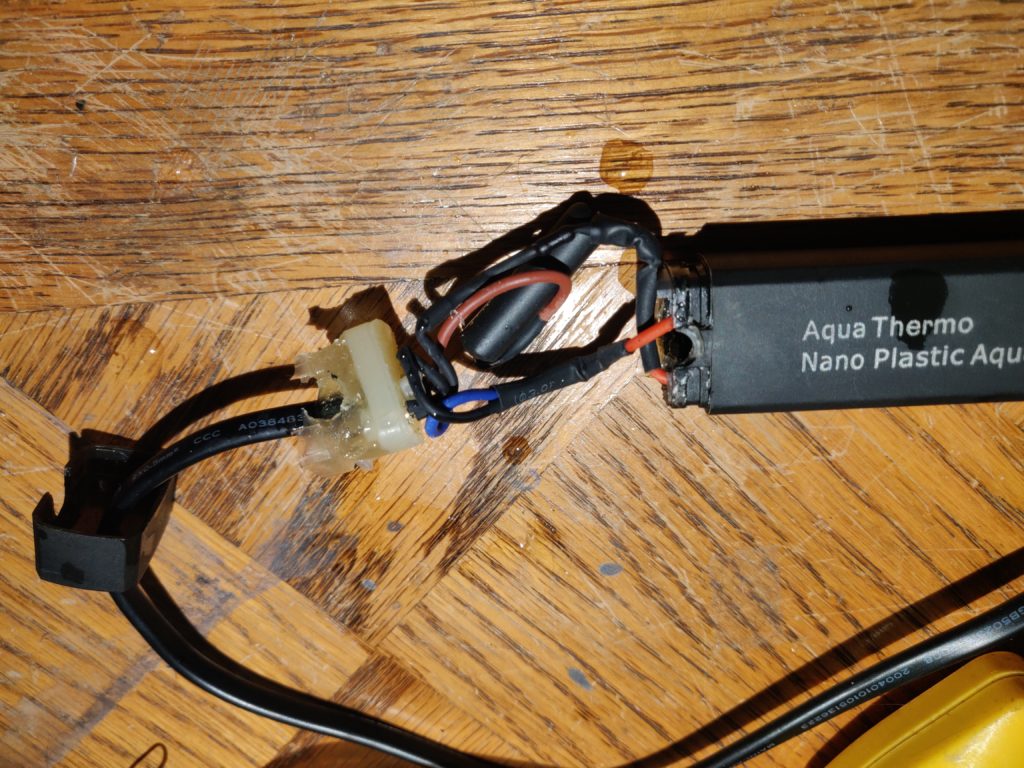
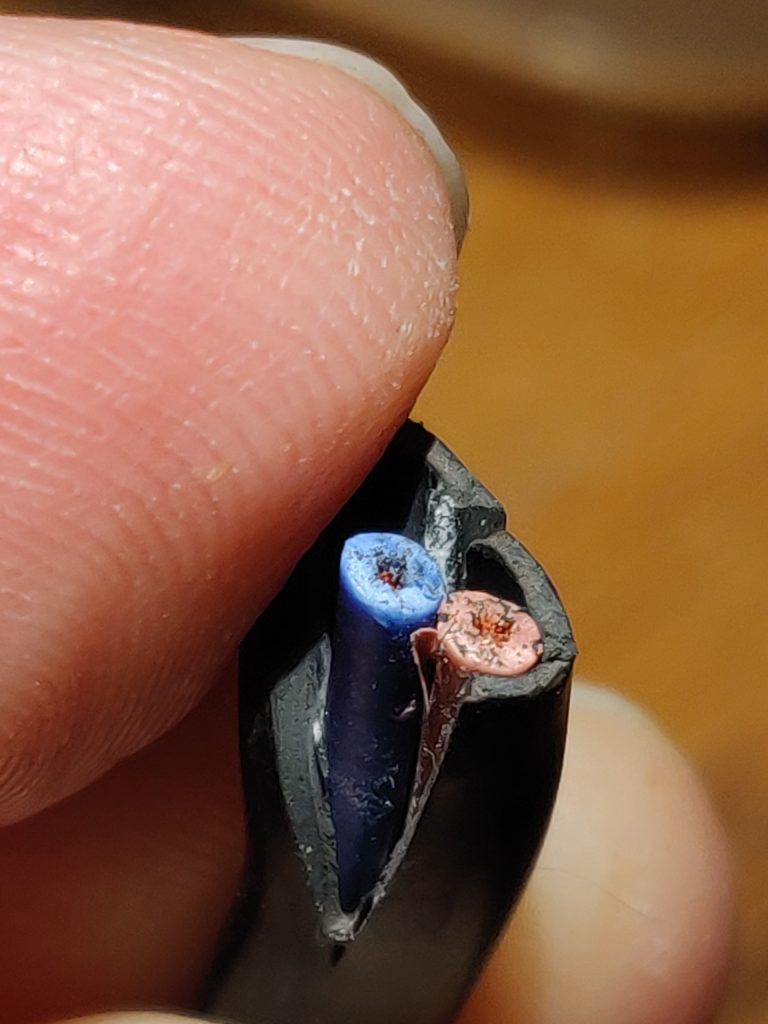
The first thing to note, aside from the complete lack of fusing, GFCI or any other safety measures, is that the inside of this compartment is dry (the small amount of water visible on the workbench was trapped between the white plug and decorative black cap, not in the innards). Leakage into this area was not the cause of failure. Cutting into the power cord reveals that it is also dry inside, with at least individually-insulated mains wires inside the outer insulation jacket. This chamber contains nearly the entire circuit, except for the heating element, buried beneath a final plug of black epoxy. Sawing the package open reveals the final component.
Sawing into the bottom, the first thing to emerge was a pile of damp(!) sand, along with a bit of fiber fill (cotton ball?) and a not-faint “fishy” smell. While many unique smells are described as fishy, this reminded me of the smell released by an electrolytic capacitor going bang in the night. Don’t ask me how the sand got damp; the plastic package appears to be a sensible one-piece design apart from the plug where the cord comes in and did not appear obviously damaged, and again, the upper components beneath the plug were bone dry.

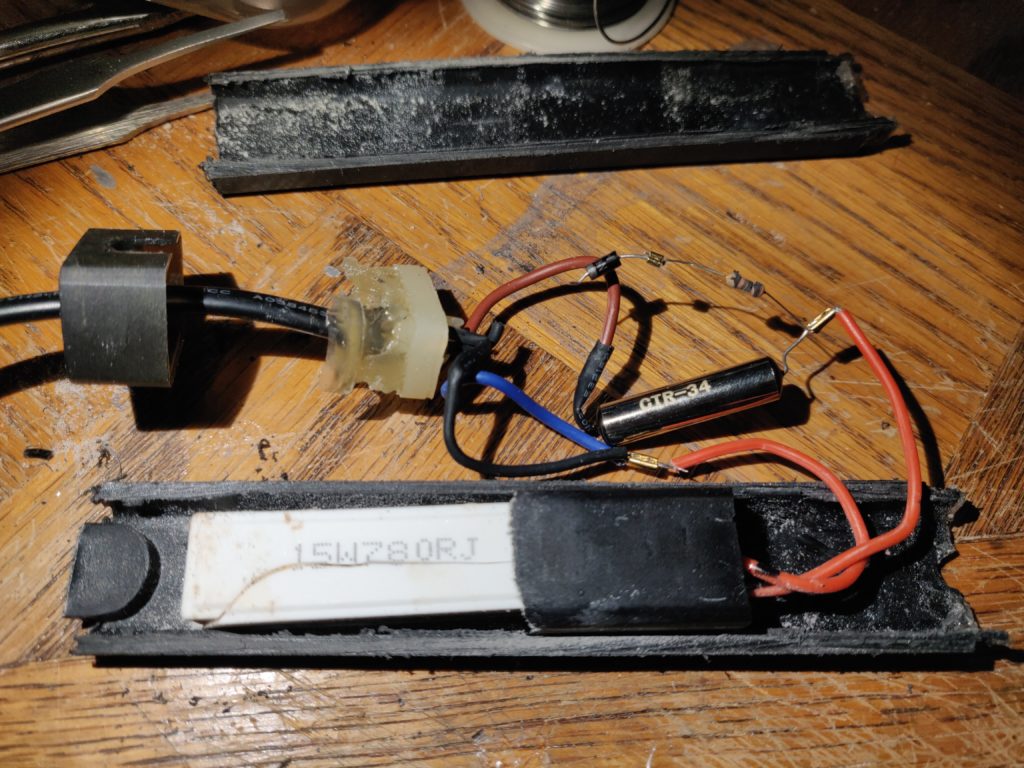
With the sand and some heatshrink out of the way, here is the full circuit, exposed for your viewing pleasure. As you might expect, there’s not much to it. The component marked “CTR-34” is a thermal switch in series with the heating element; the only other components are a current-limiting resistor and reverse-blocking diode protecting a small red indicator LED glued into the white cap. Interestingly, the heating element is an off-the-shelf radial wirewound resistor, rather than a bespoke Nichrome wire coil or similar. You can find very similar-looking name-brand parts. This is marked with a generous 15W rating – a pleasant surprise for our 10W-rated heater (more on this in a bit) – and 780-ohm resistance. It’s also marked as… no, wait, that’s a giant crack extending most of the way down the package. This was not suffered during the disassembly effort. Gently removing the cracked-off portion reveals discoloration and corrosion, as well as an even stronger waft of “fishy” smell. If the wet sand wasn’t enough to give it away, I think we’ve found our failure mode. That said, quick math on our “10 Watt” heater has the resistor dissipating 18.5W on 120VAC North American power. For the curious, the “120V” figure quoted is an RMS value – an average of sorts that already accounts for the fact that AC voltage, and thus its resistive heating power, varies throughout its 60Hz cycle (the peak voltage from the wall is around 170V).

So, we’ve done it, right? Nothing left to take apart! We even had a look inside the resistor! (pause for reverent sighs)
The “CTR-34” component is a bit of a mystery to me; I’ve never seen a thermal switch of this style before, with its sleekly polished package. The ad copy makes reference to an “Intelligent Temperature Chip”. So let’s saw it open, amirite?
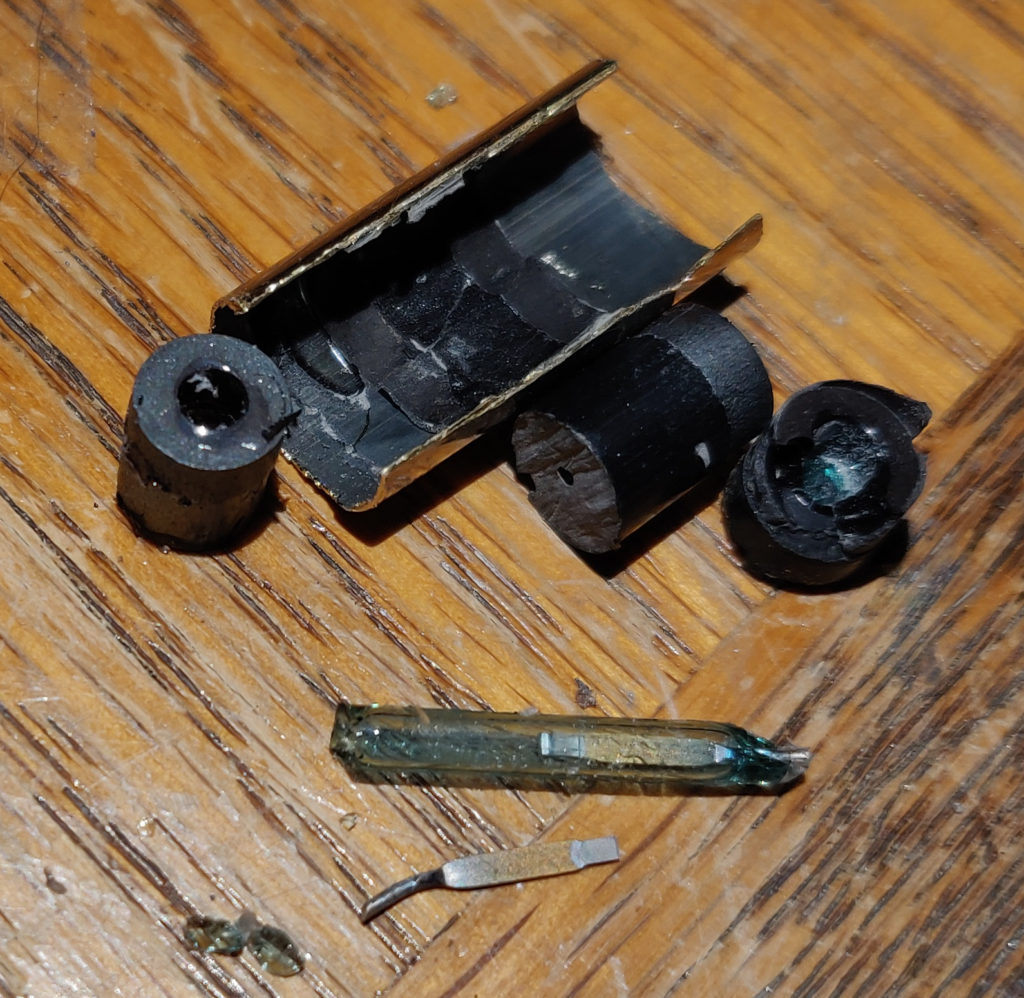
With only a little mangling in the process, we liberate the contents and see some surprising complexity. There is a tiny glass-encapsulated reed switch – not a bimetallic switch, but a magnetic reed switch – encased by a stack of black donuts, further encased in the sealed metal shell. The black donuts turn out to be a pair of small permanent magnets surrounding a piece of ferrite material with a carefully-engineered Curie point. One such material is known by the trade name Thermorite, although many competing vendors offer similar switches using the same approach. By carefully controlling the mix of dopants and particle size of the ferrite material, it can be engineered to have arbitrary Curie temperatures as low as -10C or lower. (Holy shit, that’s a thing?) Below the Curie temperature, the soft-iron ferrite is permeable to the permanent magnets’ field and holds the switch inside closed. Above the Curie temperature, the ferrite loses its permeability, allowing the switch to open and turn off the heat. If I were to guess, the sleek silver-colored shell is a special alloy such as mu-metal that protects it somewhat from external magnetic fields.
As far as I can find, switches made using this approach are simply known as thermal reed switches. I have to admit I am a little baffled by the design choice, as this is otherwise a “cost-optimized” overseas import product, but these switches run several dollars a pop (at least domestically; the cheapest I found on Mouser was $3.20@1000pcs). My best guess is that once you eat the actual cost of the component, it’s idiotproof and can be crammed into the case by trained monkeys without any manual adjustment, calibration or chance of getting out-of-whack due to rough handling.
Leave a Reply