Pick n place head update

This is a quick follow up to the pick & place head article, in which I actually build the darn thing :-) As in, not just fit-test the parts together and take a picture, but actually pick and place some stuff with it. I’ve been busy/lazy, so not too much to show in terms of software yet (the video you see below is running a ‘dumb’ g-code placement script). The parts list has been updated will be updated in the next couple days, along with new CamBam/DXF files.

Live test of the head as currently designed. This is bolted to my ghetto homebrew CNC mill, which is kinda slow. On a more built-for-purpose (or less ghetto) machine, performance should be much better.

The webcam’s weird eyeball-shaped case has been removed, revealing a rectangular board with sanely-spaced mounting holes in its corners. Also, a proper solenoid valve has been bolted to the head and hooked up to a reversed aquarium pump for suction. The rubber nozzles are from a sacrificial el-cheapo SMD vacuum pen ($3USD ,eBay), which comes with three sizes that fit on a standard 16-gauge needle.

Otherwise, it’s pretty much as described in the previous post.

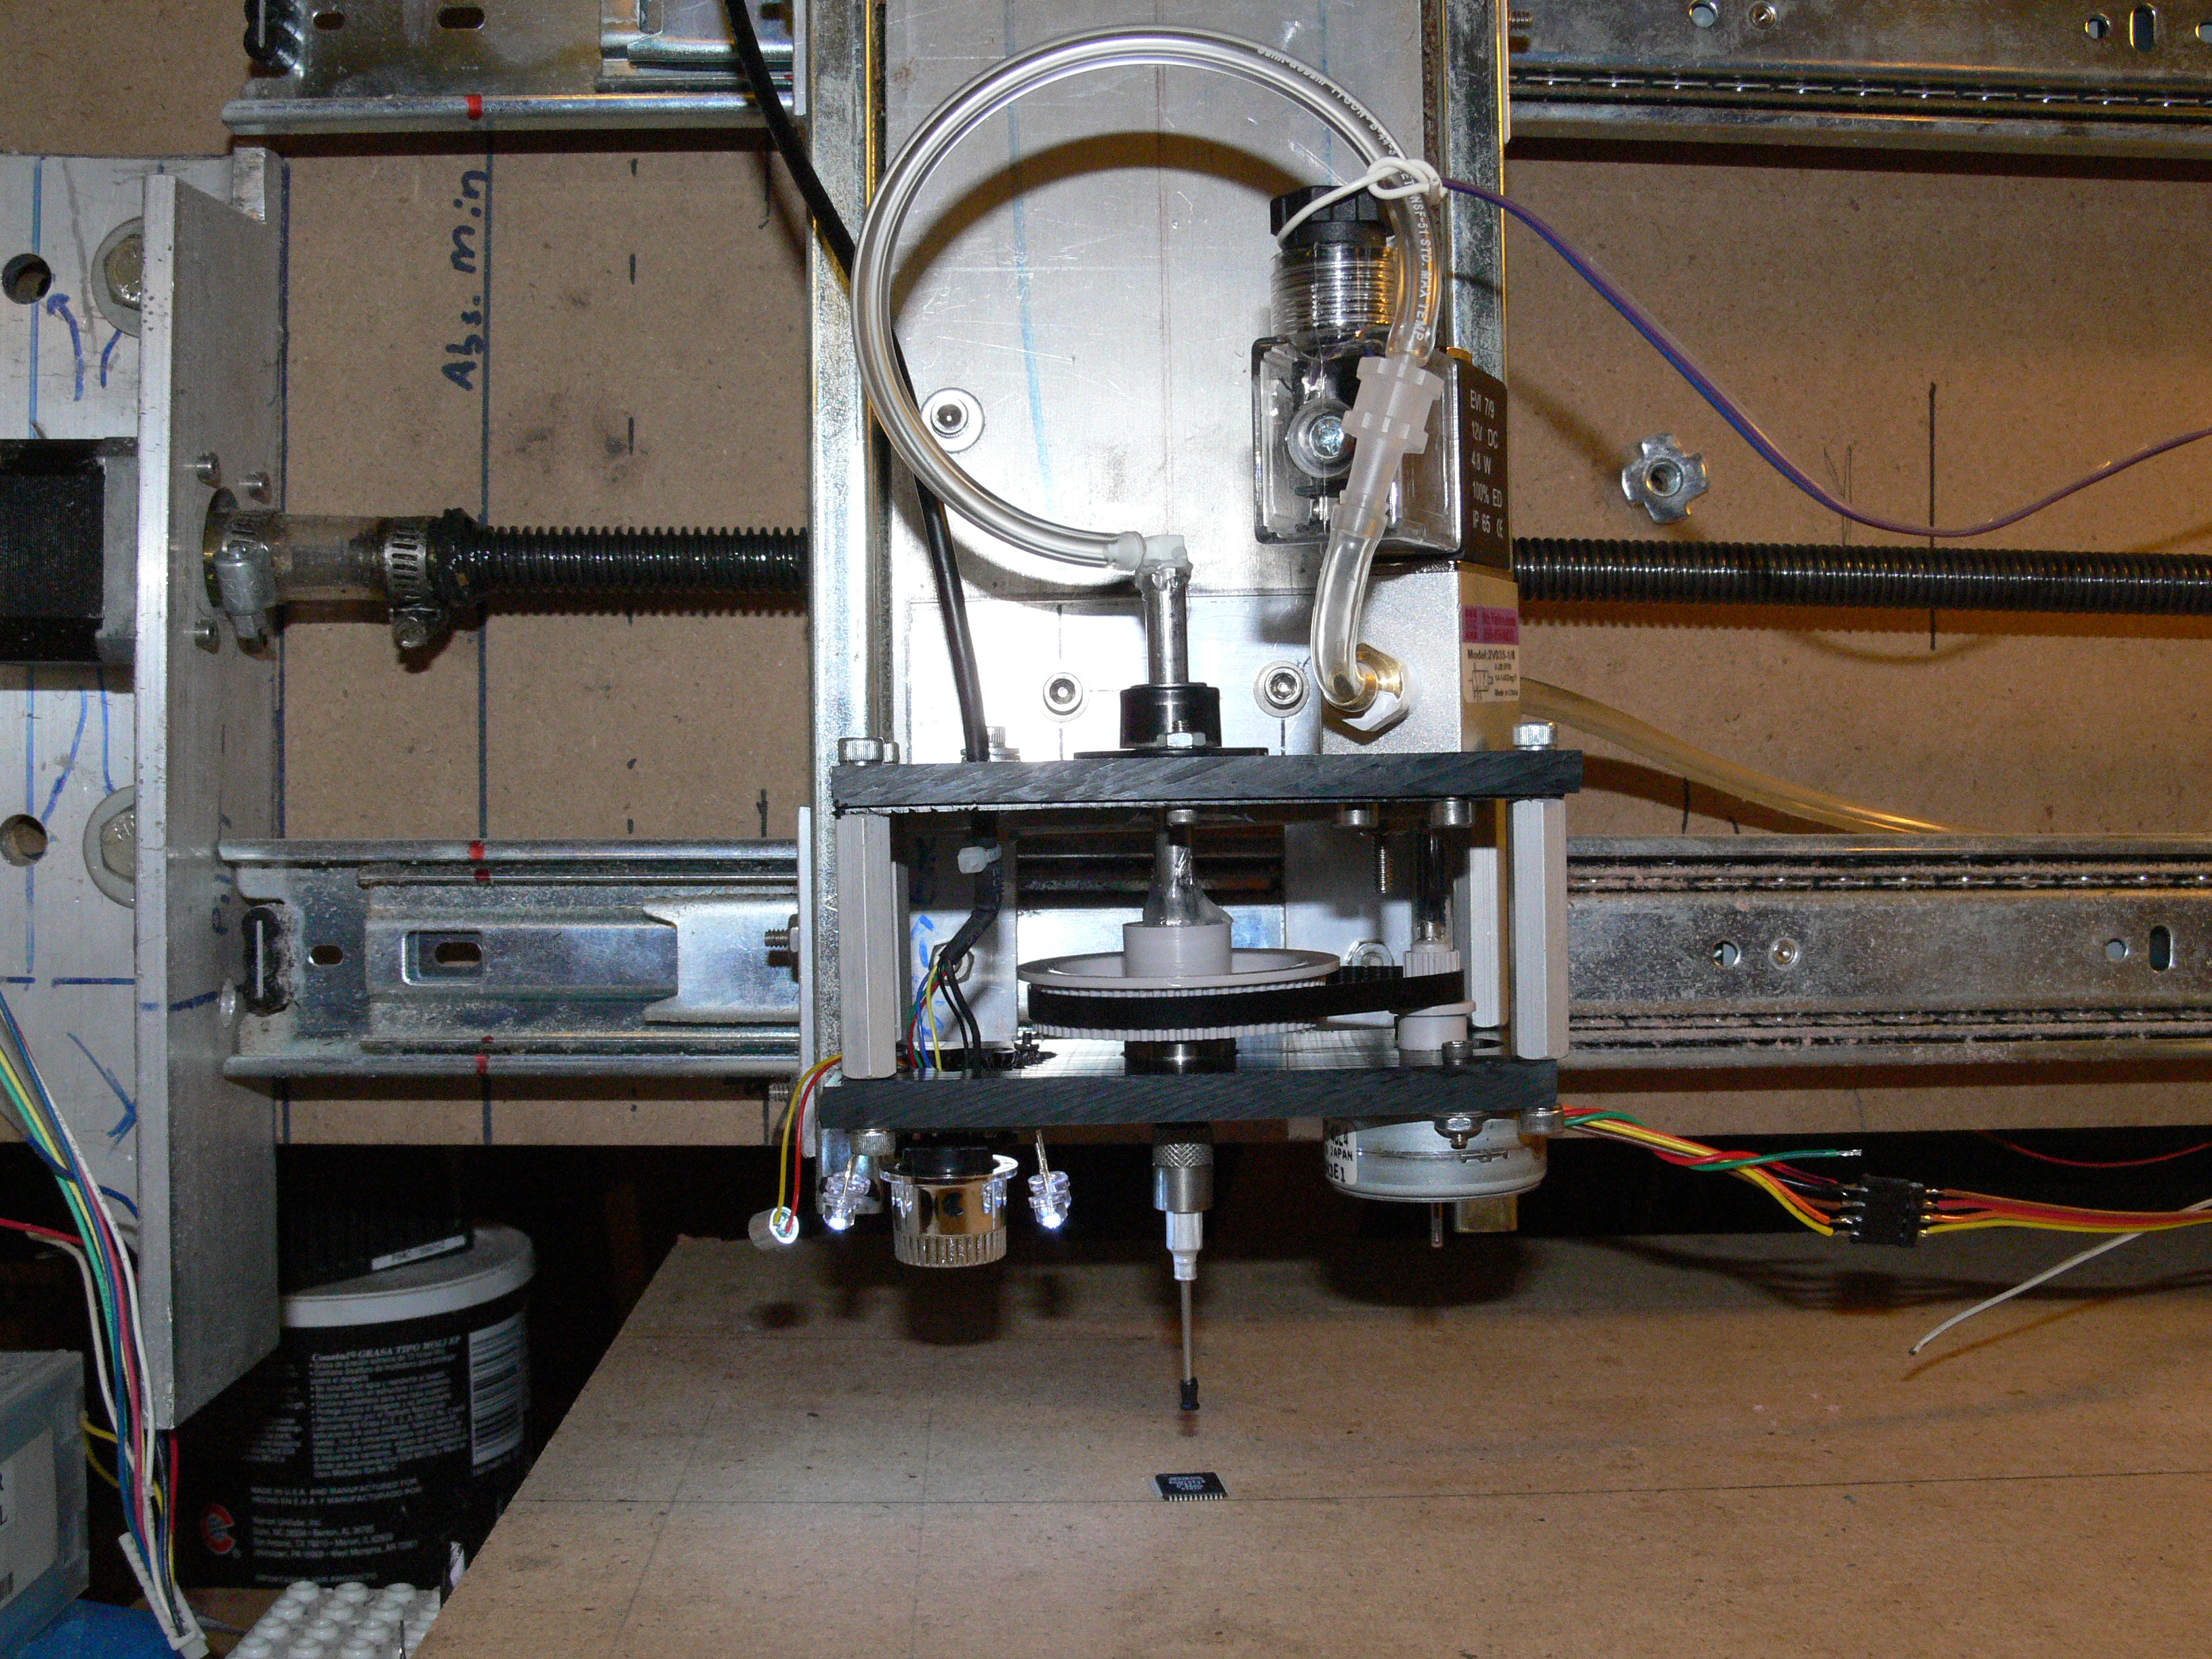
A little bit of guts. This board holds a transistor to drive the 12VDC solenoid valve from a parallel port pin, Pololu microstepping motor driver (Allegro A4983) and 5V regulator. At the top you can make out a simple pressure sensor conditioning circuit that isn’t hooked up yet.


Posted

in

by

Tags:

Comments

9 responses to “Pick n place head update”

  1. AlanS Avatar
    AlanS

    Looks really good man, my build is coming along, week or two and I’ll have a video to share (fingers crossed). I like the idea of using a tupperware to avoid opening up the pump like i did.

  2. […] been busy moving his pick-and-place build toward completion. We looked in on the first version of the vacuum head back in October. Since then he’s […]

  3. […] been busy moving his pick-and-place build toward completion. We looked in on the first version of the vacuum head back in October. Since then he’s […]

  4. arthur wolf Avatar
    arthur wolf

    Super good work !
    Hey what about using Contraptor ( contraptor.org ) for the cnc robot part ?
    ( If you are in the metric part of the world, I’d even gladly offer you free metric contraptor angle ).

  5. […] been busy moving his pick-and-place build toward completion. We looked in on the first version of the vacuum head back in October. Since then he’s […]

  6. […] been busy moving his pick-and-place build toward completion. We looked in on the first version of the vacuum head back in October. Since then he’s […]

  7. freeflyclone Avatar
    freeflyclone

    I love the lead screw coupler on the X axis motor. Simply brilliant.

  8. AlanS Avatar
    AlanS

    What solenoid valve did you use?

  9. Tim Avatar

    @AlanS: The choice of valve is not at all critical. The one I used is STC Valve p/n 2V035-1/8, bought thru a random eBay vendor. Note, that is the part number actually stamped on the valve, but it doesn’t seem to exist on their website (there is a 2V025 which appears to have identical specs though). It is a 12V, 3-way; I tied the needle to the ‘common’ port so that it is either connected to vacuum or vented to atmosphere at any given time.

    Note, this valve uses a bizarre mix of imperial and metric standards: the air fittings are 1/8″ NPT (NPT has rather bizarre naming conventions; the physical holes are closer to 1/4″), but mounting takes a pair of M3-20 bolts.

Leave a Reply

Your email address will not be published. Required fields are marked *