For a project at work I had to mold some things in this hard clear polyurethane, so my Mechie ordered a giant kit of the stuff – more than the project ever will need (and it has a very limited shelf life). So I mixed up a little more than necessary and used the leftover to pot some Blinkenlichten (intelligent LEDs).
The material used is Smooth-On brand “Clear Flex 95”. This is mainly sold as an industrial product, although smaller quantities (highly recommended! See below for why) may be availble from art supply houses. It comes in 2 separate jugs of syrupy liquid marked PART A and PART B, which are mixed together in a specific ratio by weight.
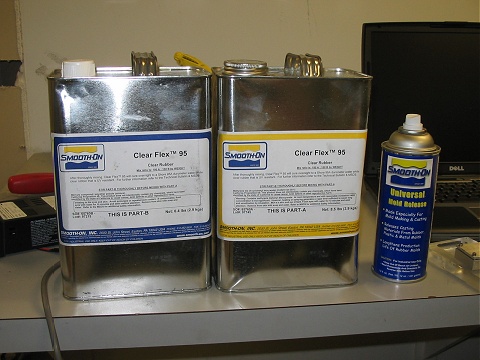
Clear Flex 95 (casting resin) and mold release spray
For every part, the general process is:
1) Make a mold (basically a pool that is the inverse shape of the part you want to make). A wide variety of shapes are possible, but the shape must be such that you can remove it from the mold again once it’s hardened. Complex shapes with convexities or overhangs might require the mold to consist of two halves that can be clamped together and later pulled apart to remove the finished piece. One good mold should be good for many, many parts. (The Smooth-On site also provides a moldmaking tutorial.)
2) Liberally spray down the mold with a “mold release” agent. This looks, feels and acts pretty much like PAM non-stick cooking spray. Same idea – it keeps the piece from sticking to the mold. (It’s possible that grease or cooking spray could work as well on some materials, but it’s disrecommended by the manufacturer and I haven’t tried it.)
3) Thoroughly but slowly mix up the liquid, being careful not to stir in air bubbles (unless that’s the effect you want – but in general air bubbles are bad news since you can’t easily control where they end up or how they are distributed). Scrape the sides of the mixing container in the process to be sure everything is getting mixed. If you want to add any colorants or other stuff (confetti, metal flake, etc.?) to the mix, now is a good time to do it.
4) Pour the mixed goo slowly, aiming for the bottom of the mold (containing any parts to be encapsulated, if any), letting the material seek its own level and chase out any trapped air. It may help to fill it partway and tilt in different directions to release any air bubbles before filling all the way.
5) (advanced stuff for perfectionists*)
6) After it hardens (see the “demold time” spec on your chosen casting material), open the mold (if applicable) and pull the piece loose. If the mold was designed smartly and mold release was applied, it should come out easily. To finish the hardening process, and clear up any remaining tackiness on the surface, it’s typically baked in a low-heat oven for several hours or left out at room temperature for several days.
Obligatory Warnings: Although you can pick this stuff up at art-supply houses, don’t let this detract from the fact that this is still a nasty industrial chemical product and should be handled with due respect. Wear gloves for mixing and handling (if you get some on your skin, you’ll know within a few minutes by the burning sensation…), and long sleeves. Use in a well ventilated area, or ideally outside. Don’t get it in your eyes, don’t mix it in your favorite beer mug, don’t bake the parts in your food oven.

Aluminum mold for USB gadget (failed unit shown, it’s the one that was handy)

USB gadget (successful unit shown)
For the USB gadget, a 2-part mold was cut from a small block of aluminum to be a bit larger than the board all around. Both pieces were sprayed with mold release. After wrapping some tape around the USB connector in case of drippage, the board was stuck into the aluminum mold block with the connector sticking out. The mix was slowly poured in until the level reached almost to the top of the main part of the mold, then the cover plate was screwed on. The complete mold was then turned upright (USB connector pointing up) and filled to just above the top of the PCB, tilting gently side to side to get the air bubbles out. After sitting like this overnight, it was removed and baked for a few hours at about 150degF in a cheap toaster oven.

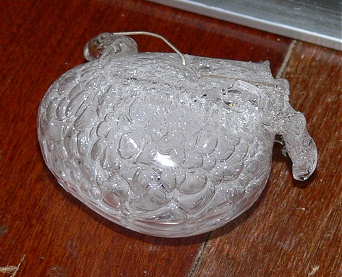
Ice cube tray "mold". The first cube in the tray bears a plastic recycling logo, which now appears on one of the molded cubes (whoops!)
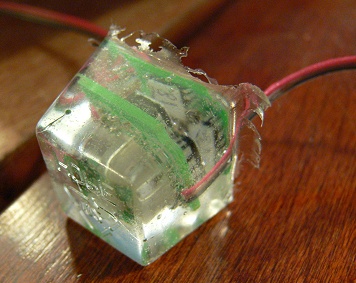
Single cube. Note extreme refractive index(?) resulting in multiple reflections of the hardware inside.
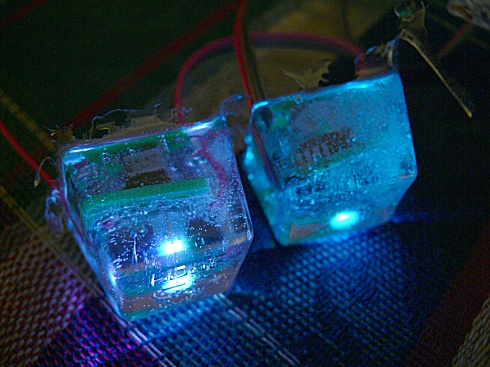
Cubes with power/data applied
The LED cubes were done exactly the same way, except instead of a complex aluminum mold the circuits were stuck in a plastic ice cube tray, and the cubes filled with the casting material. The first batch (2 cubes) turned out awesome! About a week later I mixed up a new batch and tried it again…
Fail!
Not sure what went wrong with this 2nd batch, but it remained about the consistency of pine sap (and flowed very slowly, e.g. over the course of a day or two), and after a few days it bubbled up like crazy and stayed that way. Once I returned from a 2-week trip (3+ weeks curing in air), they finally seemed to be hardened. Current theories are a) I mixed it wrong (confused the Part A and Part B) – although I checked and doublechecked… b) it really does go bad that fast after opening, or c) the leftover goo from the fat lip on top of the can (exposed to moist March air for some several straight days) helped poison the mixture. I hope to try it again sometime reasonably soon, but in the meantime it seems like a good idea to get this stuff in as small containers as possible and use it soon after it’s opened. Blowing some dry inert gas into the cans before closing could extend its life a bit.
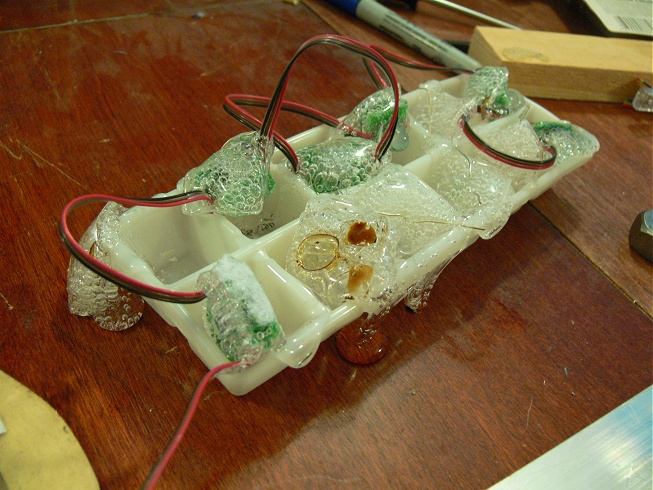
After the unsuccessful attempt to demold them from the cube tray resulted in “melting” all over my table, the above is the mostly unsucessful attempt to get them back into the cube tray. Each step represents about 2 days’ worth of melting. This could potentially be reproduced intentionally for artistic effect, IF there is some way to force it to harden up at the desired time (such as immersion in straight Part A/B, if it resulted from a bad mix ratio). After several weeks’ exposure to open air, the stuff shown seems to have finally hardened. Comparison of the melty results to the original cubes also shows that they started out completely bubble-free; the massive amount of air bubbles present in the end result most likely formed as the result of some slow chemical process in the dud mix. Small bubbles began to appear by the day after pouring and continued growing until the material hardened. (It may even be continuing still – I’ll find out one day if one of these melty cubes suddenly explodes.)
Bubbles where there were no bubbles before

Being blinked, top side
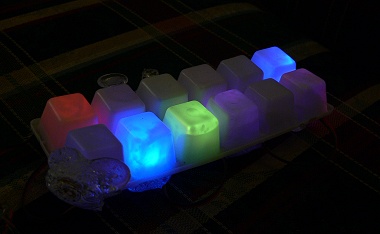
Being blinked, bottom side
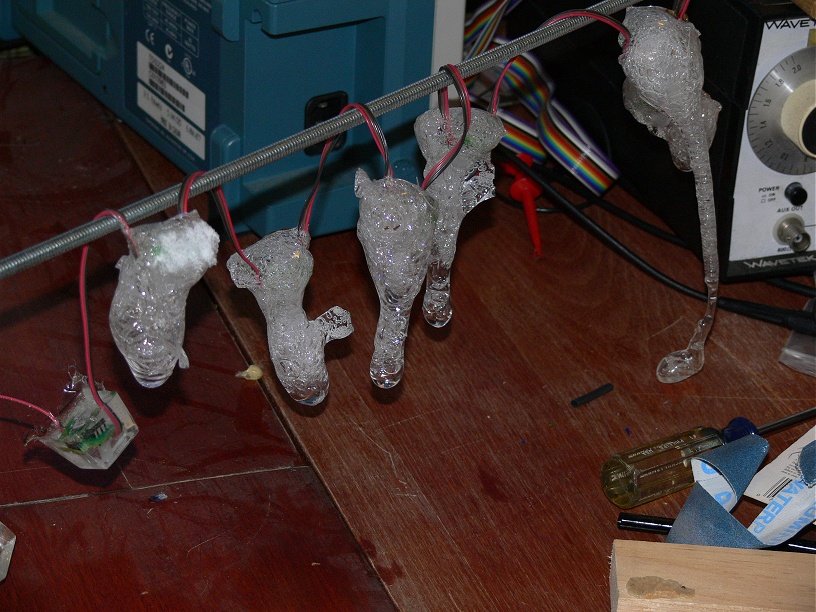
After some days of continuing to melt around in the tray, I looped them over a rod and let them just melt freely. Here is how they finally hardened.

Actually, when lit the melty ones kind of look badass!
* if you really, really don’t want air bubbles, one way to get rid of them is to build a vacuum chamber (the compressor from a discarded cube fridge or dehumidifier, etc. makes a good hobby vacuum pump and compressor). Basically any container you can place the still-liquid mold into and pull a vacuum on it, thus causing any trapped air bubbles to swell and burst (or become buoyant enough to rise to the top and escape). Then, by reversing the pump (positively pressurizing the chamber) until the mix hardens, any small remaining bubbles can be compressed to nearly invisible size :-)
Leave a Reply